Box Joints for the Garden Planters
A Garden Project, Not a Workshop Project
My wife is starting a new garden. She wanted planter boxes. Big ones. The kind that look like they belong, not like they were hammered together on a Sunday afternoon.
So I cleared a corner of the workshop and got to work.
The Material
I'm using fir boards. 200mm wide, 45mm thick, 4.2 metres long. That's a serious chunk of wood for a planter, but these boxes are going to live outside through Danish winters and Danish summers and everything in between. Thin walls would warp and split within a season. Thick fir will last.
Fir is also kind to the wallet, easy to work, and ages to a soft silver-grey outdoors that I genuinely love. No stain, no paint, no fuss. Let the weather do the finishing.
Why Box Joints
I could have screwed the corners together. Quick, easy, done in an afternoon.
I didn't want to.
Box joints (some people call them finger joints) give you a huge amount of long-grain glue surface. That means a corner that holds itself together without relying on a screw biting into end grain. End grain is where outdoor furniture goes to die. Water gets in, the screw rusts, the wood swells and splits, and a year later you're rebuilding the same thing.
A glued box joint in 45mm fir is going to outlive a lot of things in this garden.
The Template
Here's the part I got a little obsessed with.
Cutting box joints in 45mm thick stock by hand is a lot of work. Doable, but slow. So I made a template.
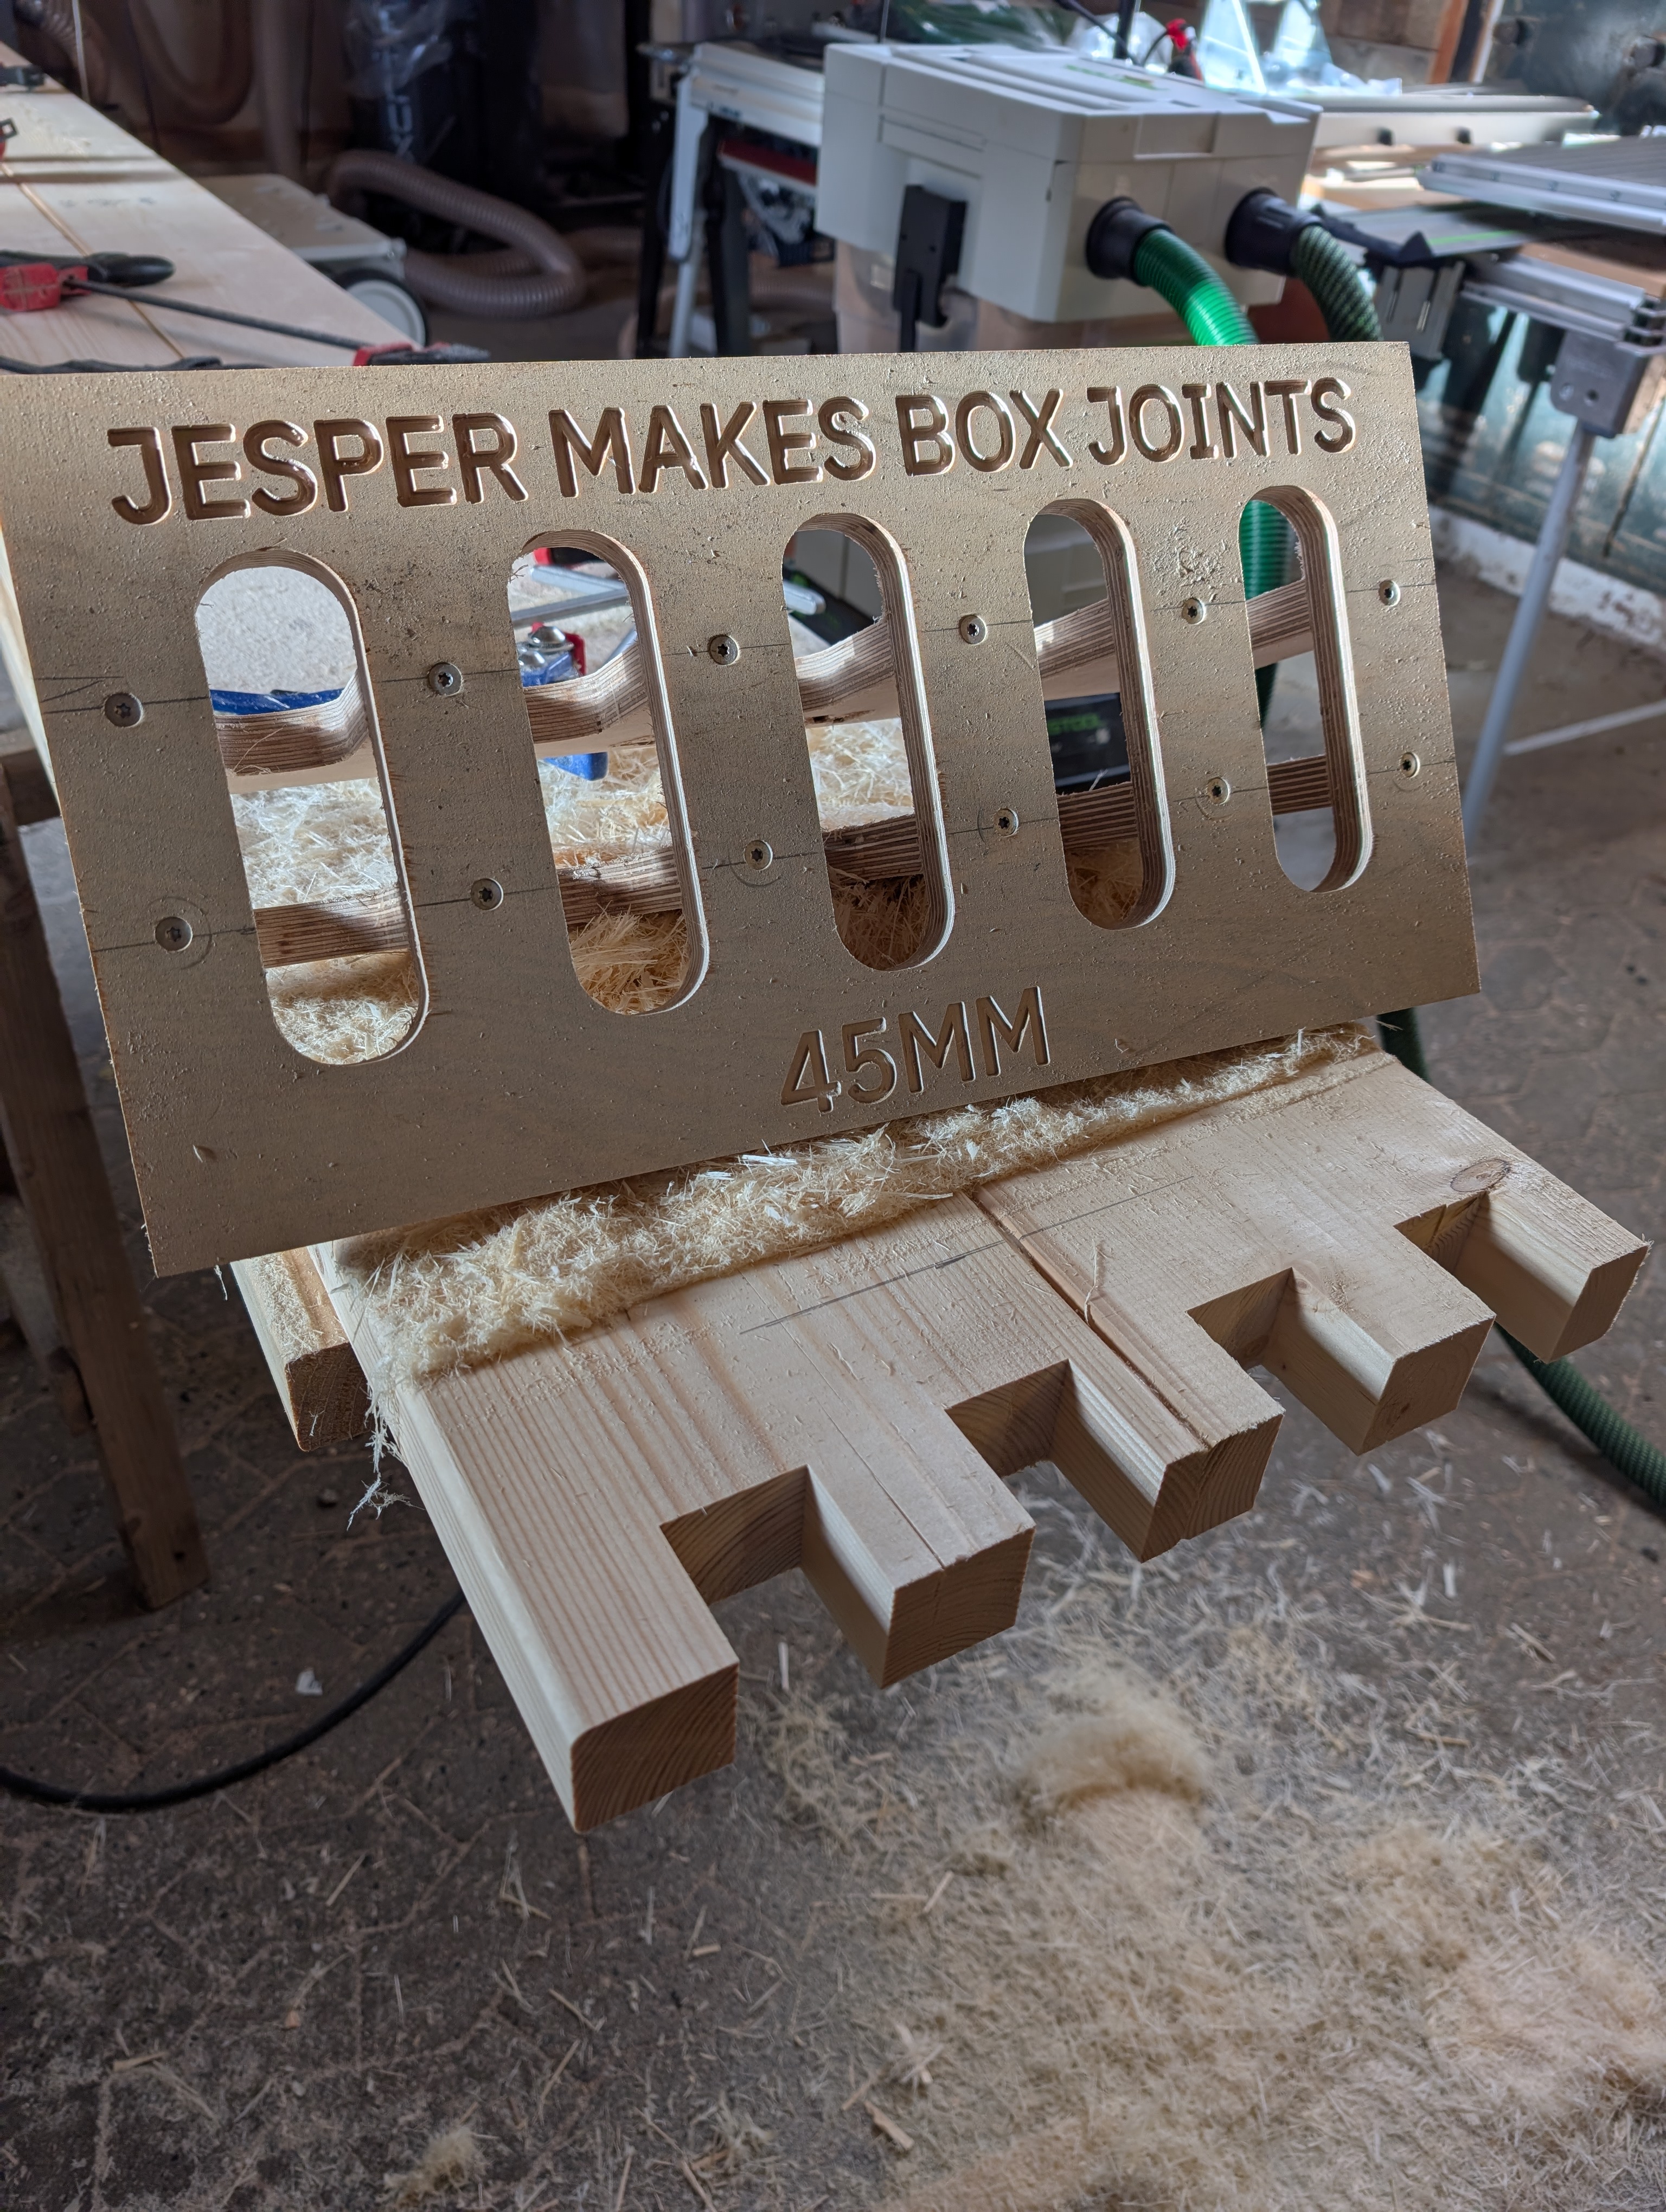
I designed it in Shaper Studio. Five fingers, 45mm wide each, sized exactly to the board thickness so the joints come out square and even. Then I cut the template itself out of 21mm birch plywood using my Shaper Origin. The Origin tracks position with those domino stickers and follows the design with millimetre accuracy. It's a lovely tool for one-off jigs like this.
The finished template has the words JESPER MAKES BOX JOINTS 45MM cut right into the face. Partly because I like the way it looks. Partly so future-me knows exactly what this jig is for when it gets buried under sawdust in six months.
Routing the Joints
With the template made, the actual joinery is simple.
Clamp a fir board, drop the template on top, line up the reference marks, and route. I'm using my Makita 2300 plunge router with a flush trim bit. The bearing on the bit rides the template, the cutter follows the bearing, and clean finger joints drop out the bottom.
It's fast. It's repeatable. And every joint comes out the same.
The Makita 2300 is an old workhorse of a router. Not flashy, not cordless, doesn't have a digital readout. Just a big motor, a solid base, and enough power to plunge through 45mm of fir without complaining. I've had this router for years and it has never let me down.
Where I'm At
Right now I'm working through the routing. Every board for every box, one corner at a time. Once all the joints are cut, it's a glue-up marathon: stand the four sides up, brush glue into every finger, clamp it square, check the diagonals, move on to the next one.
Then the bottoms, the drainage, and finding a way to get them from the workshop down to the garden without doing my back in.
More on all of that when it happens. For now, I'm just enjoying the rhythm of routing joints with a template I'm proud of.
That's the part nobody tells you about woodworking. Sometimes the best part of a build isn't the finished thing. Sometimes it's a jig that came out exactly the way you drew it.
Ready to build something?
Browse plans, printable reference sheets, and digital products for woodworkers.
Browse our woodworking plans and files →